
GitHub Command Line Basic
Posted on: 2014-12-02
The first thing is to create a repository. You can create one free at GitHub. After created the repository on GitHub get the URL of the repository and copy paste to the console with the clone command. 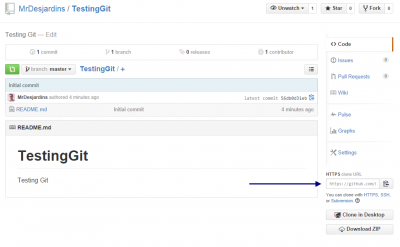
Download the repository to your computer with the clone command.
git clone https://github.com/MrDesjardins/TestingGit.git

git add README.md
You can use the add command with the the -u for all modified file but not for adding new file.
In both case, if you check the status you will see that the file is modified.
git status git commit -m "Message here" git status
Checking the status will not any more say that the file is modified but that your branch is ahead of origin/master by one commit
Doing another change on the same file will set back the status to modified.
You need to commit again before sending everything to the server. If you do not want to have the latest change, before commiting you can rollback the file with the checkout command.
git checkout readme.md
Before having your code available with everybody, it is possible to see all branches.
git branch -r git branch -a
To send the code to the server, we need to push. We need to specify the the remote. git push origin master
This was the easy step. Now let's dp a branch that we will than later merge back into this master branch.
git checkout -b "Branch1" //or $ git branch Branch1 $ git checkout Branch1
if we are checking the branches, we will see one local branch and not a remote one.
 git branch -a
 //create file test1.txt
 git add text1.txt
 git commit -m "Added test1.txt from branch1"
 git checkout -b Branch2
 //create file test1.txt
 git add text1.txt
 git commit -m "Added test1.txt from branch2"
From there we can do several thing like a pull request, pulling directly or pushing to another branch. Let's first stats with a pull request. To do, you need to go on Github.
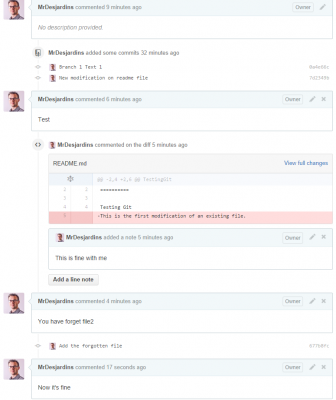
The web UI allows you to comment on the branch, but also inside every files. At the end, we can close the pull request.
You can close the pull request if you are not satisfy or you can accept and merge form the website or the console. The console allows you to get the code and test it before pushing it back to the server. If you do not have the branch on your computer than you need to fetch and checkout. Finally, merge the master to the branch to check the pull request with the whole main branch.
git fetch origin git checkout -b branch1 origin/branch1 git merge master
Once everything is done (mergin, making sure that it build, unit test works, etc), than it is the time to merge everything in the master. or if you already have the branch in your computer, you can get the code with the fetch command and than check the modification with git log. Finally, you can get merge.
git fetch origin origin/branch1 git log origin/branch1 git merge origin/branch1
To accept the pull request this can be done by checkout the master and merge the branch into it. Finally, push everything to the server.
git checkout master git merge --no-ff branch1 git commit -m "Merging Blah Blah" git push origin master
Like in this example, conflict can occur.
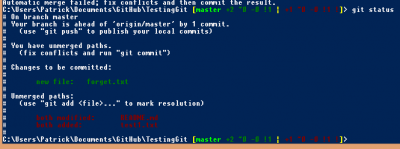
Before resolving conflict, you need to be sure that you have configured the merging tool. Here is the configuration for WinMerge. This configuration must be set in your .gitconfig from your user folder. You can access it by using : %USERPROFILE%/.gitconfig
 [merge]
 tool = winmerge
 [mergetool "winmerge"]
 cmd = "'C:/Program Files (x86)/WinMerge/WinMergeU.exe'" -e "$MERGED" keepBackup = false trustExitCode = false
 [diff]
 tool = winmerge
 [difftool "winmerge"]
 cmd = "'C:/Program Files (x86)/WinMerge/WinMergeU.exe'" -e "$LOCAL" "$REMOTE" -dl "Local" -dr
If you prefer kdiff3 tool which is a 3-way commit tool use this command
 [merge]
 tool = kdiff3
 [mergetool "kdiff3"]
 path = C:\\\\Program Files (x86)\\\\KDiff3\\\\kdiff3.exe keepBackup = false trustExitCode = false
From there you can go git mergetool and git will go through all files that must resolve conflict.
git mergetool
Once all conflicts solve, merge done, commit done and push to the server done, than the pull request is automatically closed for you.
We still have branch 2 to merge. Let's do it without pull request. But before, lets move into branch2 and delete the readme file. Than let's try to undo this delete.
git checkout branch2 del readme.md git checkout -- readme.md
Same thing with a new file.
git add readme.md2 git reset readme.md2
Last thing with a modified date.
 //modify file
 git checkout -- readme.md
So you have two remembers two different commands. One is checkout and one is reset to undo something to a file.
Concerning undoing, if you have commit, you can also undo this command. In fact, committing only put the file in the stage area. To undo a commit use the git reset command.
git reset --soft HEAD~1