How to cache Html element with Html5 Canvas and LocalStorage
Posted on: 2015-12-07
This caching idea is limited to some scenarios where you have defined html zones. For example, if you are working with dynamic charts or having a complex logic to render Html controls or even complex canvas. In all cases, the goal is to show to the user something relevant instead of just a loading spinner for the subsequent calls.
The concept is that once you have loaded the zone the first time, you take a snapshot and store it into the local storage as a visual copy -- an image. The idea behind using an image is that you do not have to wait for extra dependencies like JavaScript files, CSS stylesheets or Ajax calls to have something displayed to the user. Meanwhile, the normal flow of your application must continue to have the real html loading with fresh values from the backend. The major advantage of that solution is that you have no slowness because of the network, neither of the server or from complex rendering client side code -- you get it directly pre-rendered from the client side cache.
This article will show you how to take a screenshot,in JavaScript, with the library called Html2Canvas, stores it into the local storage and how to do the swap between this fake cached view with the real Html one. First, let's create an example scenario with two zones. One zone, called box1 will take 3 seconds to load and the box2 will take 5 seconds. The goal is to display the fake cached view when loading the real data, and thus make it appearing to the user as it was already loaded.
This solution is having some caveats. First, if the time between the image and the real html takes too much time, than the user may be confused. Thus, this is a good solution for improving a solution that has good performance on the start. I would say that you can easily use that solution for zones that load without this trick under 3-5 seconds. You can always have a subtle loading visual hint somewhere if it's longer. Second, if the cached image is very different from the new visual, than it will flicker during the swap of the image to the real html. Third, the local storage is limited in size, between 5 to 10 megs. That mean that you are limited to what you can cache with that solution. Overall, this solution is not a silver bullet and should be used as a blazing fast boost experience to an experience that is reasonable to load. It's not a solution to apply to a menu for example, because user may interact very fast with it and would hit a wall or should I say an image. It's good for element in a page that has a high visual interest or with element that has basic interaction like linking to somewhere else because the image can fulfill that contract.
Let's dive in the code.
<div id="box1" class="box">
  <i class="fa fa-spinner fa-spin"></i>
</div>
<div id="box2" class="box">
  <i class="fa fa-spinner fa-spin"></i>
</div>
.box{
  width:150px;
  height:150px;
  background-color:lightblue;
  margin:10px;
}

.box i{
  font-size: 3em;
}
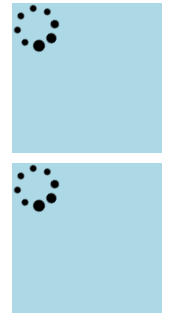
This will produce the following html : 
The normal loading experience is done by using JavaScript's timeout. Both box display a different text, one display also an image.
setTimeout(renderBox1, 3000);
setTimeout(renderBox2, 5000);
function renderBox1() {
  var $box = $('#box1');
  $box.text('Loaded 1');
  var $icon = $('<i>').addClass('fa fa-hand-peace-o');
  $box.append($icon);
}

function renderBox2() {
  var $box = $('#box2');
  $box.text('Loaded 2');
}
So far, it takes the amount of time defined to see the spinner being removed and replaced by the real content.
The next step is to have in those render box the code to set the cache with the image of the rendered result. Box 1 will have the text and the image, box 2 just the text. This require to change both render method to call a cache method. Since the experience is so seamless that we will also, for the purpose of this demo, add some text under the boxes once refreshed with real value. So, the visual will be on the first call that we display the spinner, we cache, we display the text under the box. On the second load, we do not display the spinner since this one is replaced by the cached version right away. The texts under the boxes are shown only after the delay with the real value.
function renderBox1() {
  var $box = $('#box1');
  $box.text('Loaded 1');
  var $icon = $('<i>').addClass('fa fa-hand-peace-o');
  $box.append($icon); cache($box);
  $box.after('<p>Not cached data box 1 in place</p>');
}

function renderBox2() {
  var $box = $('#box2');
  $box.text('Loaded 2');
  cache($box);
  $box.after('<p>Not cached data box 2 in place</p>');
}
We also need to change the loading code to go check in the cache. We try to read the cache, the local storage, and if nothing
var box1Cached = unDataToCanvas(localStorage.getItem('box1'));
var box2Cached = unDataToCanvas(localStorage.getItem('box2'));

if(box1Cached){
  $('#box1').html(box1Cached);
}
setTimeout(renderBox1, 3000);

if(box2Cached){
  $('#box2').html(box2Cached);
}
setTimeout(renderBox2, 5000);
Finally, the load and save in the cache need to be coded. The save will create a canvas and we will store the data into a base64 representation. This is done by calling the method toDataUrl() method.
function cache($elementToCache) {
  var id = $elementToCache.attr('id');
  html2canvas($elementToCache, { onrendered: function(canvas) {
      window.localStorage.setItem(id, canvas.toDataURL());
      }
  });
}
The loading is more tricky. We need to load from the local storage the base64 image, create an image with the source to this base64 and return it.
function unDataToCanvas(data) {
  var img = new Image();
  var canvas = document.createElement('canvas');
  img.onload = function() {
    canvas.width = 150;
    canvas.height = 150;
    canvas.getContext("2d").drawImage(img, 0, 0);
  };
  img.src = data;
  if(data){
    return img;
  } else{
    return null;
  }
}
The whole code with a working demo is on JsFiddle.net : http://jsfiddle.net/mrdesjardins/31qca6b0/.
