
Nodejs with React and TypeScript
Posted on: 2016-05-24
If you want to run some Facebook React component on the client side and still have all the benefits of TypeScript, it's possible. This article will show you how to setup React with TypeScript. I have already cover previously how to setup Visual Studio Code with Nodejs. You should go take a look because this text consider that everything is setup.
First, you need to get the TypeScript definition file for React. This is required to have all functions signatures and let TypeScript validate that you are using legal calls. To do so, use npm to download react and react-dom TypeScript definition file. The first command is to get tsd, the two next ones are to install the libraries needed.
npm install tsd -g tsd install react --save tsd install react-dom --save
You should already have TypeScript tsconfig.json file configured for you from the previous article. Make sure you have the compilation property "jsx" set to "react".
{
  "compilerOptions": {
    "target": "ES6",
    "module": "amd",
    "sourceMap": true,
    "jsx": "react",
    "experimentalDecorators": true,
    "emitDecoratorMetadata": true,
    "declaration": false,
    "noImplicitAny": false,
    "removeComments": true,
    "noLib": false,
    "preserveConstEnums": true,
    "suppressImplicitAnyIndexErrors": true
  }
}
The next step is to have a web server running. This one will provide the Html file, JavaScript (being compiled from TypeScript), Css. The simplest way is to use the server called Express.
npm install express
This will install a small server that you will be access by your localhost with port 3000. This can be changed anytime in the bin\\www file (generated by Express).
For the purpose of this demo, we will create a new page that will say "hello world", on the client side, using React. Inside the file app.js, generated by Express, we will add a new route entry. The mapping between hello as a string from the url is set to a JavaScript route file, in that case named also "hello".
app.use('/hello', hello);
The route details are specified in routes/hello.js file. The route tells that if the url is localhost:3000/hello to map to the hello view. Here is how it should look:
var express = require('express'); var router = express.Router();

/* GET home page. */ router.get('/', function(req, res, next) { res.render('hello', { title: 'Hello Word Title' }); });

module.exports = router;
The view by default use the Jade engine. This can be modified in the app.js. For this tutorial, Jade engine is not really used and will reference a basic Html file. To do, create a file named "hello.jade" in the "views" folder.
include hello.html
Create also an Html file hello.html:
<html>
  <head>
    <link rel="stylesheet" src="stylesheets/style.css"/>
    <script src="javascripts/require.js"></script>
    <script>
    require.config({ baseUrl: "/", paths: { "react": "react/dist/react", "react-dom": "react-dom/dist/react-dom", } });
    </script>
   </head>
   <body>
      <h1>Title1</h1>
      <div id="hello"></div>
    </body>
    <script> require(["javascripts/hello", 'react', 'react-dom'],function(Hello, React, ReactDom) {
      var helloWorldComponent = ReactDom.render(Hello({name:"Patrick"}), document.getElementById('hello')); } );
    </script>
</html>
This has several important point. First, you need to have require.js to use your JavaScript in module. to do so, download requires.js and make a copy in public/javascripts folder. This will let you ask for specific JavaScript to be fully loaded before using them. In our case, we need our custom hello control, react and react-dom to be fully available before generating the component.
npm install requiresjs
Be careful, you need to copy the require.js file from the node_modules/requirejs folder next to your JavaScript. However, copying react and react-dom is not required because we can setup requirejs to have paths. Finally, in the Html, we add a script that will wait to have your hello JavaScript file, react and react-dom before using ReactDom.render to populate the component into the div with "hello" id.
Since we are using TypeScript, we need to create in the javascript folder a file named hello.tsx. When we compile TypeScript, this will generate a JavaScript file that will be used by the require statement in the Html. A simple TypeScript for hello world is to have a React component that will render "Hello" + property.
/// <reference path="../../typings/react/react.d.ts" />
/// <reference path="../../typings/react/react-dom.d.ts" />

import * as React from 'react';

interface HelloProps { name: string;} interface HelloState { }

class Hello extends React.Component<HelloProps,HelloState> {
  constructor(props: HelloProps) {
    super(props);
  }

  public render() {
    return <div>Hello {this.props.name}</div>
    }
  }

  function HelloFactory(props: HelloProps) {
    return React.createElement(Hello, props);
  }

export = HelloFactory;
The first two lines are there to specify that we are using react. It's a link to the definition file. Without them, the compiler doesn't know where to get all existing React classes.
The code defines two interface. One for properties, one for state of the React component we are building. The class take the property in parameter and reader a Html that says hello. Finally, we export the class to be accessible outside this file.
To see everything, open your console at the project root and run : node .\\bin\\www and go to : http://localhost:3000/hello
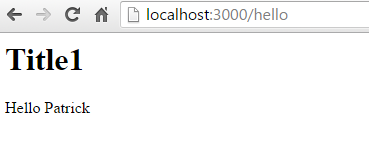
This example is very straight forward but is not simple if you just start with Nodejs, React and TypeScript. It's a lot of libraries that need to be stitches together. It's also a very moving field with a lot of changes. A caveat of this tutorial is that we only show a read only example of React. In a next article, I'll show you how to have a full loop that allow you to input value and have the control to be re-render. You can find the whole source code in this GitHub Repository.